
Okay, here’s my attempt at a blog post, following all your instructions. It’s gonna be rough and ready, just like a real person’s casual sharing:
Alright, so I took on this project – putting together a keel volleyball birch wooden floor. Sounds fancy, huh? It wasn’t as bad as I thought, but definitely a learning experience.
First thing, I had to clear out the space. This was probably the most boring part. Moving furniture, sweeping up dust bunnies the size of actual bunnies… you get the idea. I made sure the subfloor was pretty level, I mean no mountains or valleys. Gave it a good once-over with the shop vac, too.
Prep Work is Key (Duh!)
Next up, I gotta gather all the materials. This part’s a must. I needed to check the flooring planks for damage. A couple of boxes had some dings, so I set those aside for cuts later – waste not, want not, right?
- Keel structure which is pre-fabricated, I checked carefully.
- Birch flooring planks (obviously!).
- A moisture meter, that’s what it’s called, I think.
- Some basic tools: hammer, saw, spacers, that kinda thing.
I used the moisture meter on both the subfloor and the wood planks. The readings needed to be pretty close, I read online. Makes sense – you don’t want the wood going crazy after you install it.
Getting Down to Business
Then, I set my mind to the actual laying. I decided to start the keels’ placement. They were easy to handle. The key, I figured, was to get the first row super straight. I used spacers to leave a gap along the walls – expansion, you know? Wood moves with the weather.
The assembling work was a bit time-consuming. Because the keel structures need to be assembled, I used appropriate screws to connect them together. The whole process needed a lot of patience and care, you know. Can’t rush these things.
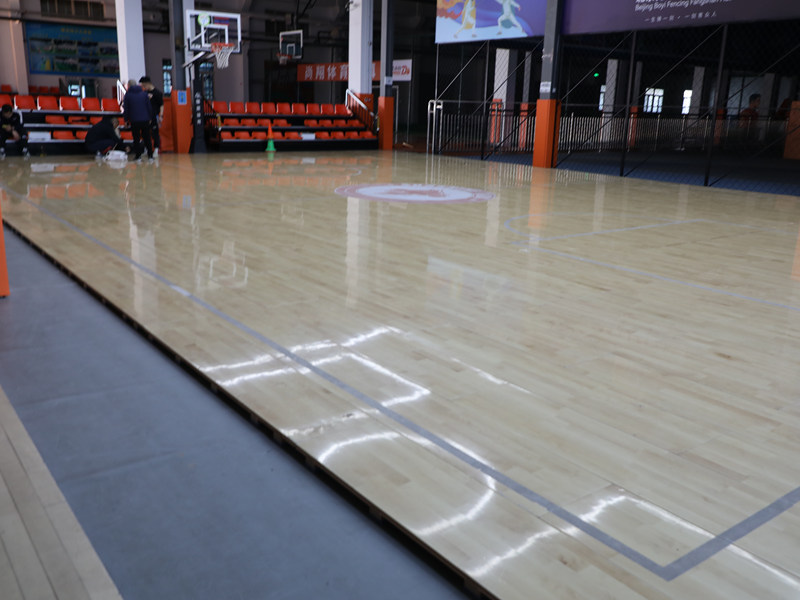
After the keel structure was done, I put the birch flooring on top. Interlocking them together was a bit like putting together those large puzzles. I was careful not to use too much force, and I used a rubber mallet to give it a tap.
I kept going, row by row. The sawing was the trickiest part, especially around doorways. I messed up a couple of planks, no lie. But hey, that’s why you have extras, right? Measure twice, cut once – I learned that the hard way.
The Finish Line
Finally, after a few days, all the planks are down. I installed the baseboards to cover up those expansion gaps. It instantly looked a hundred times better. Like, legit professional (almost!).
I’m pretty proud of the whole thing. It’s not perfect, but it’s solid, and it’s my work. Would I do it again? Maybe. It’s definitely satisfying to see the finished product, but it’s a workout, man. My back is still complaining.
So there’s, that my wooden floor adventure, a real experience for myself, for sure.

